고정 헤더 영역
상세 컨텐츠
본문
반응형
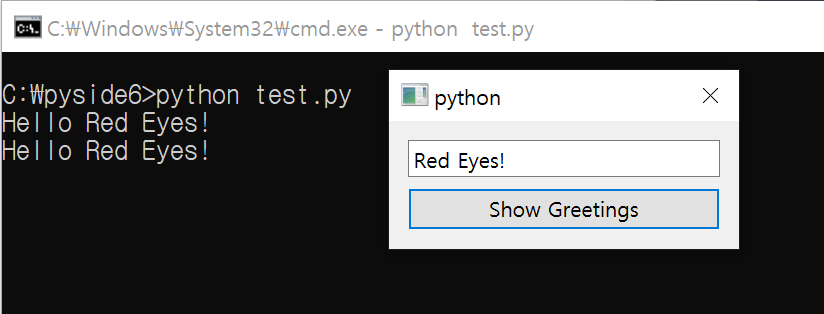
간단한 예제를 통해 Dialog 생성 방법에 대해 알아보자.
import sys
from PySide6.QtWidgets import (QLineEdit, QPushButton, QApplication,
    QVBoxLayout, QDialog)                              # 사용할 class를 import함

class Form(QDialog):                                   # Form class 정의

    def __init__(self, parent=None):                   # Form 객체를 생성하면 호출되는 __init__ func
        super(Form, self).__init__(parent)
        # Create widgets
        self.edit = QLineEdit("Write my name here")    # LineEdit 생성 (default 값: "Write my name here" )
        self.button = QPushButton("Show Greetings")    # Button 생성 ( button name : "Show Greetings" )
        # Create layout and add widgets
        layout = QVBoxLayout()                         # Widget을 세로로 나열하는 layout manager
        layout.addWidget(self.edit)                    # layout에 lineEdit 추가
        layout.addWidget(self.button)                  # layout에 button 추가
        # Set dialog layout
        self.setLayout(layout)                         # layout 설정
        # Add button signal to greetings slot
        self.button.clicked.connect(self.greetings)    # button click 시, greetings function 호출

    # Greets the user
    def greetings(self):                               # greetings function 정의
        print(f"Hello {self.edit.text()}")

if __name__ == '__main__':
    # Create the Qt Application
    app = QApplication(sys.argv)                       # QApplication class의 instance 생성
    # Create and show the form
    form = Form()                                      # Form class instance 생성
    form.show()                                        # Form instance를 show함
    # Run the main Qt loop
    sys.exit(app.exec())                               # Qt main loop 시작

아래 code 중 "self.edit.text()" 는 LineEdit에 적혀진 text를 read하는 code이다.
    def greetings(self):
        print(f"Hello {self.edit.text()}")
LineEdit에 text를 write하기 위해서는 setText() 를 사용하면 된다.
self.edit.setText("Write my name here")
반응형
'pyside6' 카테고리의 다른 글
| [PySide6] QMainWindow 사용하기 (0) | 2021.09.01 |
|---|---|
| [PySide6] 버튼 사용하기 #2 (0) | 2021.09.01 |
| [PySide6] Table Widget을 사용하여 Data 출력하기 (0) | 2021.09.01 |
| [PySide6] 버튼 사용하기 #1 (0) | 2021.08.31 |
| [PySide6] 설치 및 시작하기 (0) | 2021.08.31 |


